Tracking Deadlines, Pauses and Extensions
Last updated: September 16, 2026
By default, due dates in Phaselaw are set by hand on each case. If you'd rather not track them manually, you can turn on Managed timeline in your policy — and Phaselaw will calculate the due date for you, warn you as it approaches or passes, and keep it accurate through any pauses and extensions. On high-volume requests, that means no deadline slips through the cracks.
This article covers how managed timelines work. For how to build the policy itself, see Creating Your First Policy.
Manual vs Managed Timelines
A policy can hold timeline settings — a response deadline, extension period, and so on — but those settings aren't used to calculate anything until Managed timeline is switched on.
Managed timeline off – Due dates are set manually on each case.
Managed timeline on – Phaselaw calculates due dates automatically, and unlocks extensions and pausing.
To turn it on, open your policy and toggle Managed timeline (or use the Turn on managed timeline shortcut in the banner at the top of the Timeline section).

The Timeline Settings
With Managed timeline on, these fields in the Timeline section control how deadlines are calculated:
Response Deadline (Days,Weekdays or Months) – how long you have to respond (for example, 30 days for a one-month UK GDPR deadline)
Extension Period (Days,Weekdays or Months) – The amount of time you are allowed to extend the response deadline after the initial period.
Max Allowed Extensions – how many extensions are permitted
Acknowledgment Deadline (Days,Weekdays or Months) – The amount of time you have after the initial request to acknowledge receipt of the request to the data subject.
Tracking a Deadline on a Case
Create or open a case.
Apply a policy that has Managed timeline enabled.
Enter the date the request was submitted.
Phaselaw calculates the due date from the submission date plus your Response Deadline. For example, a request submitted on 6 September with a 30-day response deadline is due on 6 October.
Pausing a Request
Sometimes the clock needs to stop — for example, when you go back to the data subject for clarification before you can continue. Pausing stops the deadline clock and resumes it when you're ready.
Click Pause.
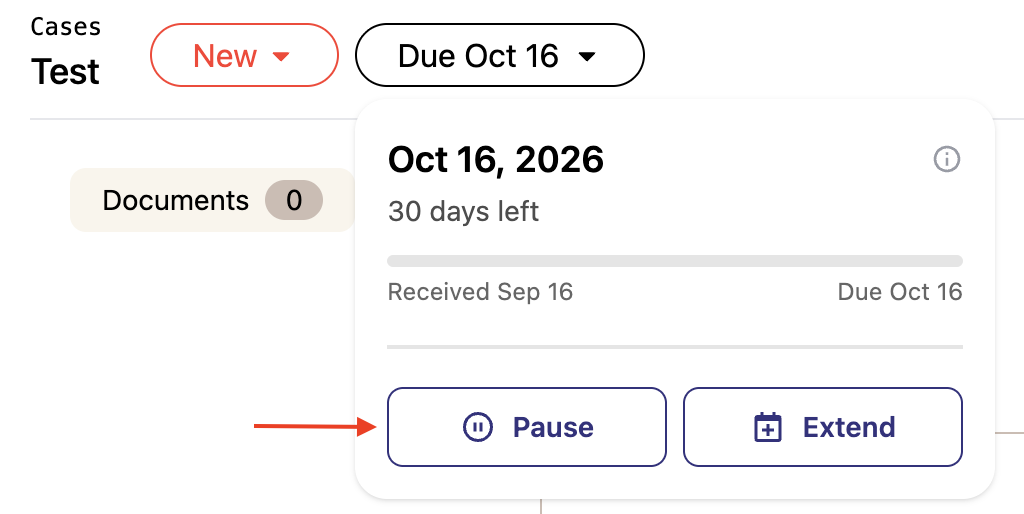
Set the effective date of the pause. You can backdate this — useful if you paused the request before you had a chance to log it in the product.
Add a reason for the pause (optional)
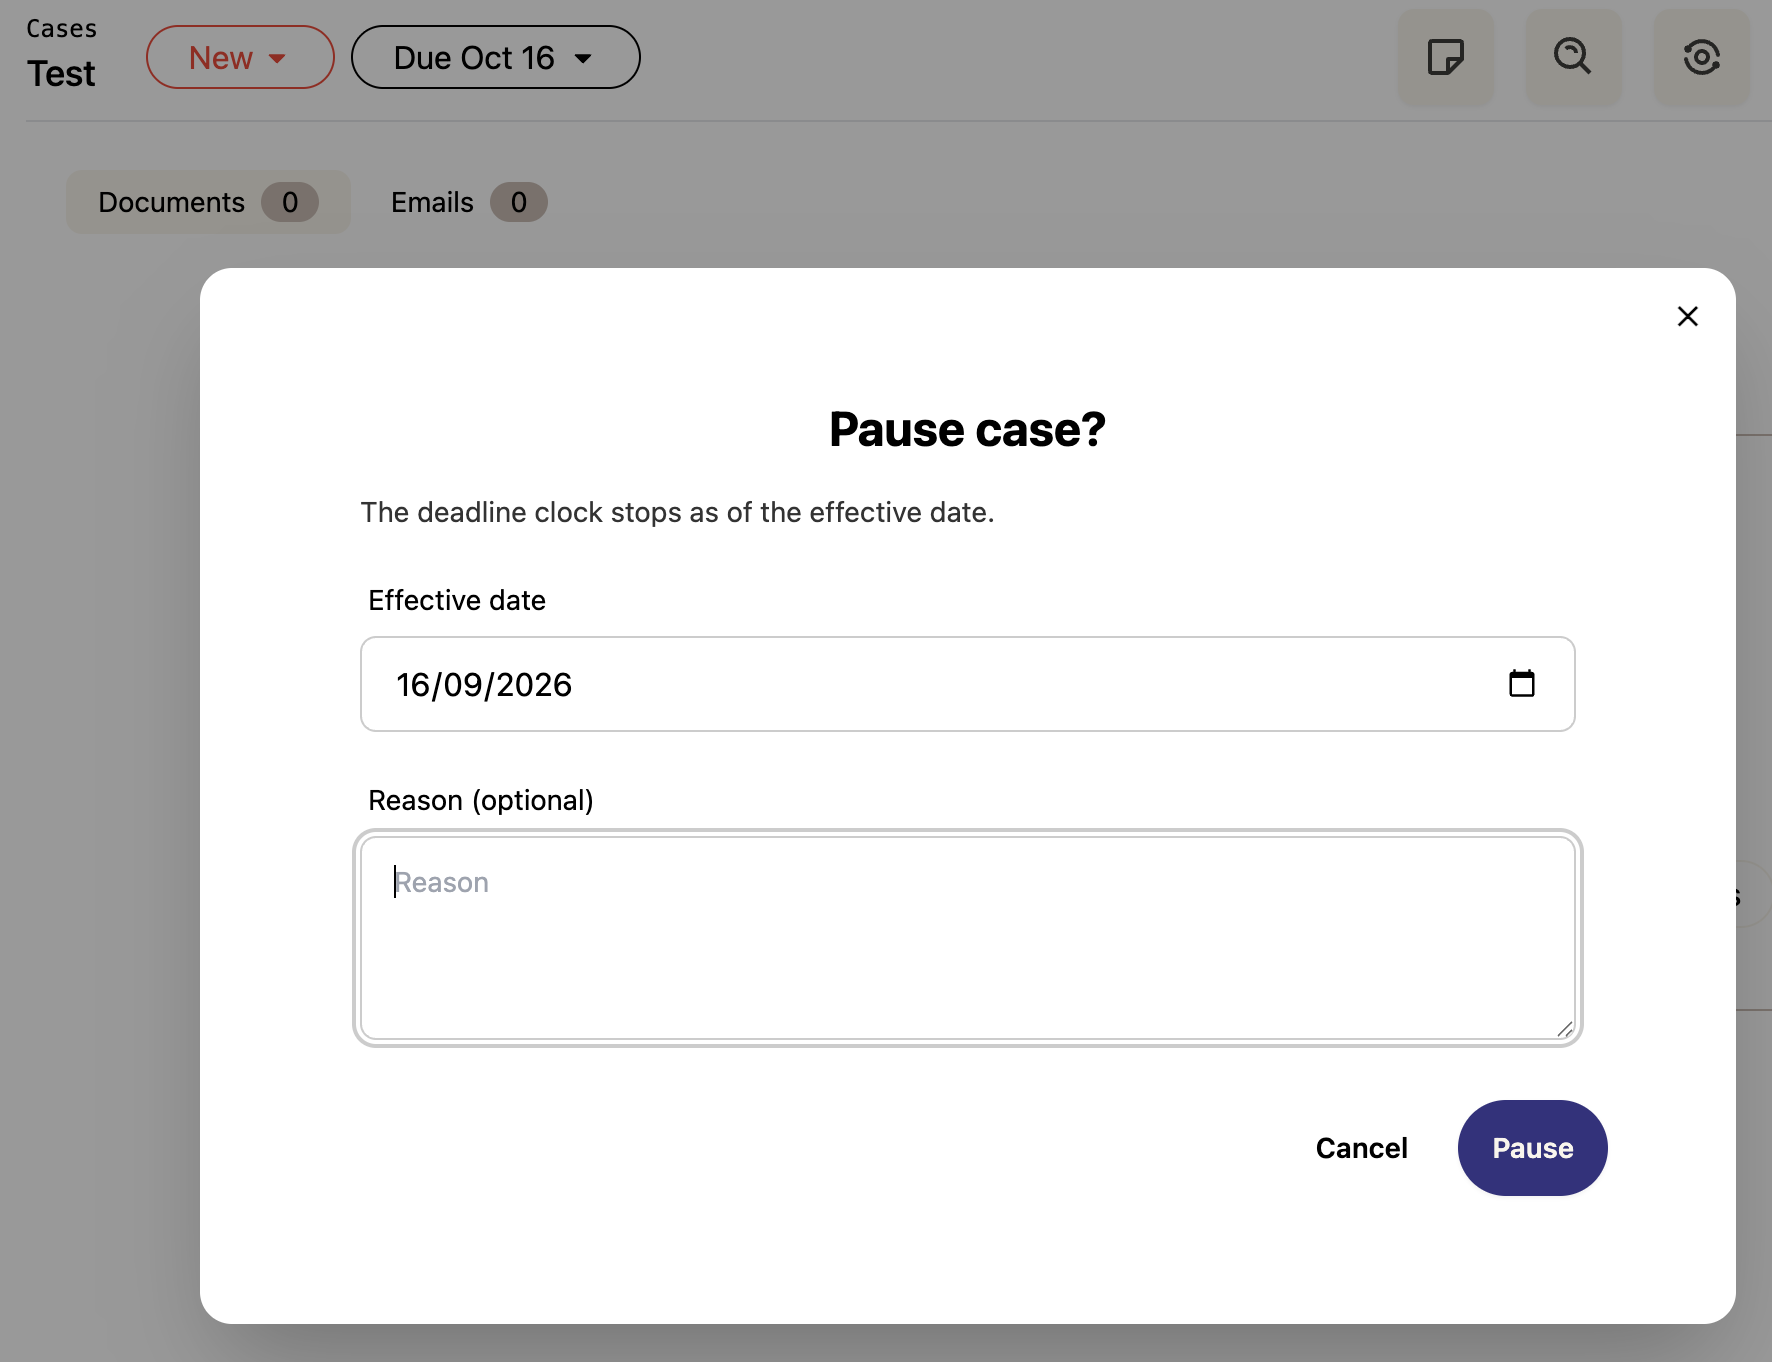
Select Pause. The case will now show as Paused.

Resuming a Request
Click Resume. The deadline clock starts again, and the due date is automatically recalculated to account for the time the case was paused — so it moves out by the length of the pause.
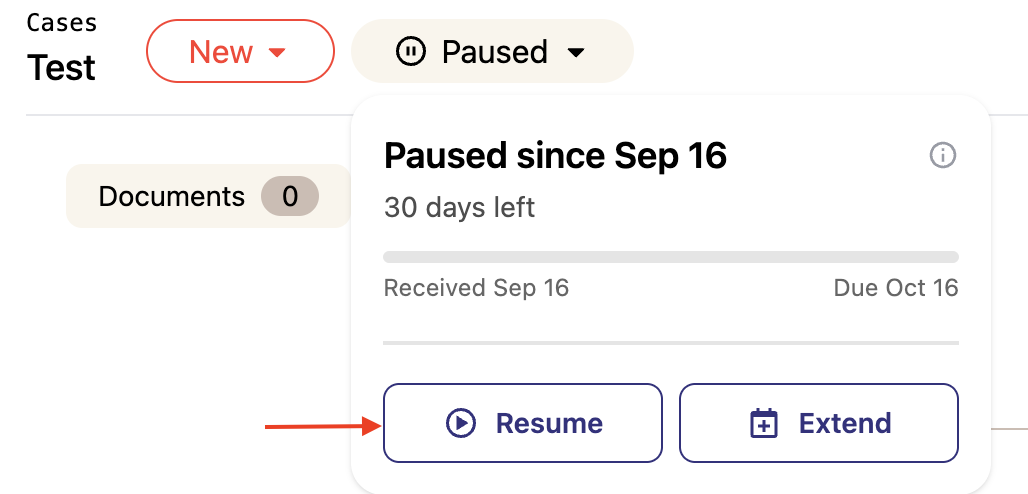
Set the Effective date of the resume.
Add a reason for the resume (optional)
Select Resume
Applying an Extension
If you need more time, you can extend the deadline — up to the Max Allowed Extensions set in your policy.
Click Extend.
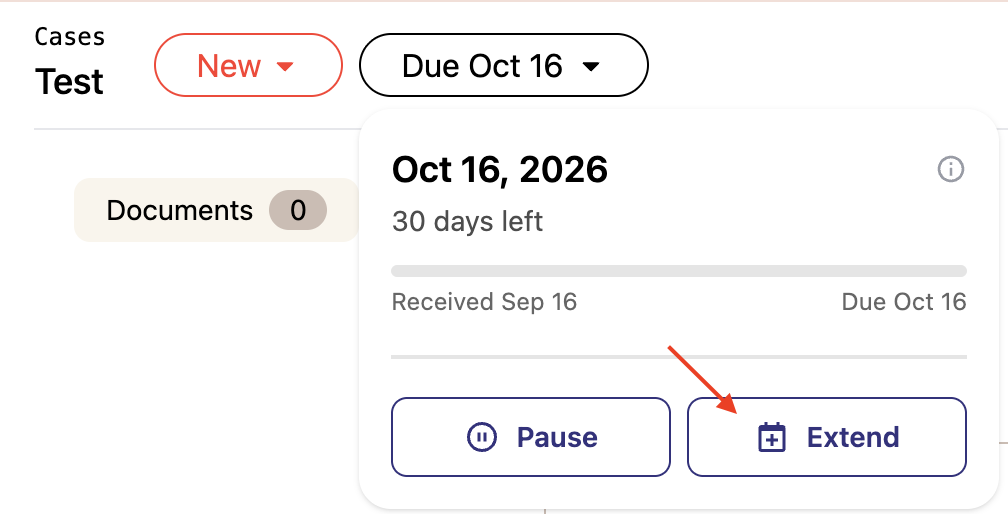
2. Add a reason for the extension (optional)
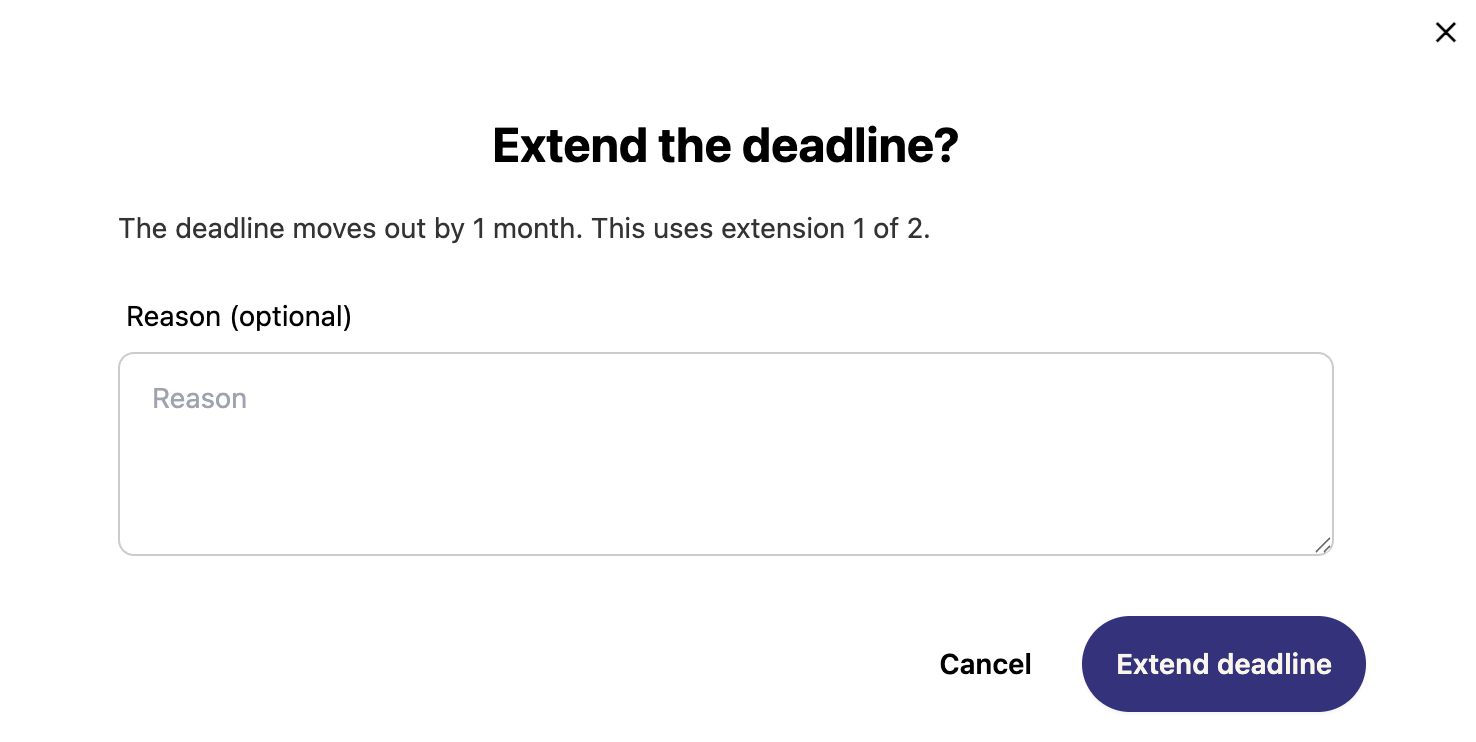
Select Extend deadline
The due date moves forward by your Extension Period. If you extend by mistake, you can undo it.
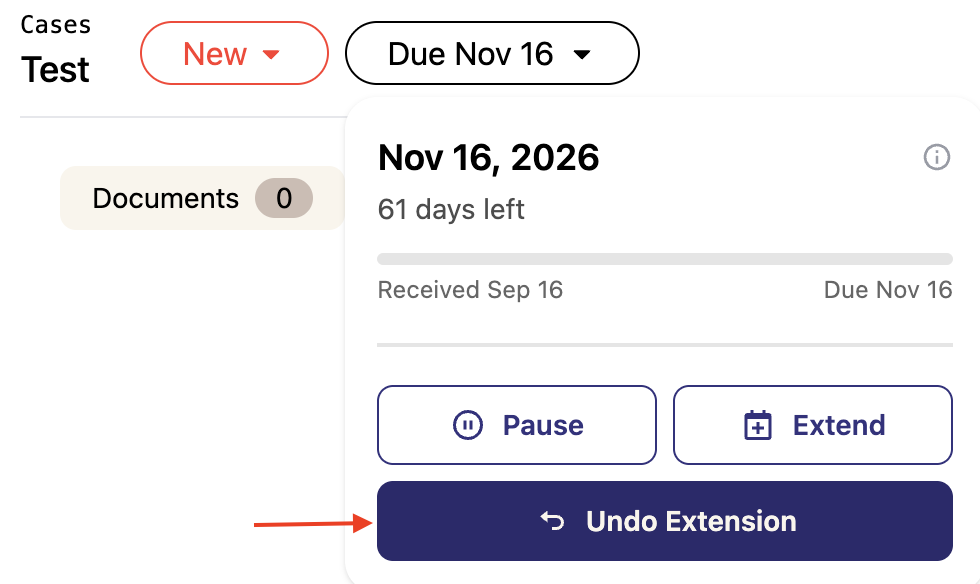
Once you reach the maximum number of extensions allowed by the policy, no further extensions can be applied.
Tips
Set the submitted date accurately when you create the case — everything else is calculated from it.
Use the effective date on a pause to keep your timeline honest if you log the pause after the fact.
The extension limit comes from your policy, so if you need a different limit, adjust Max Allowed Extensions there.