A Tour of the Phaselaw Interface
Last updated: June 26, 2026
In this article: A guided overview of the main areas of Phaselaw, so you know where everything lives before you start your first case.
The Cases Screen
When you first log in, you'll land on the Cases screen - your home base in Phaselaw. From here you can see all of your active cases at a glance, pick up where you left off, or create a new case.
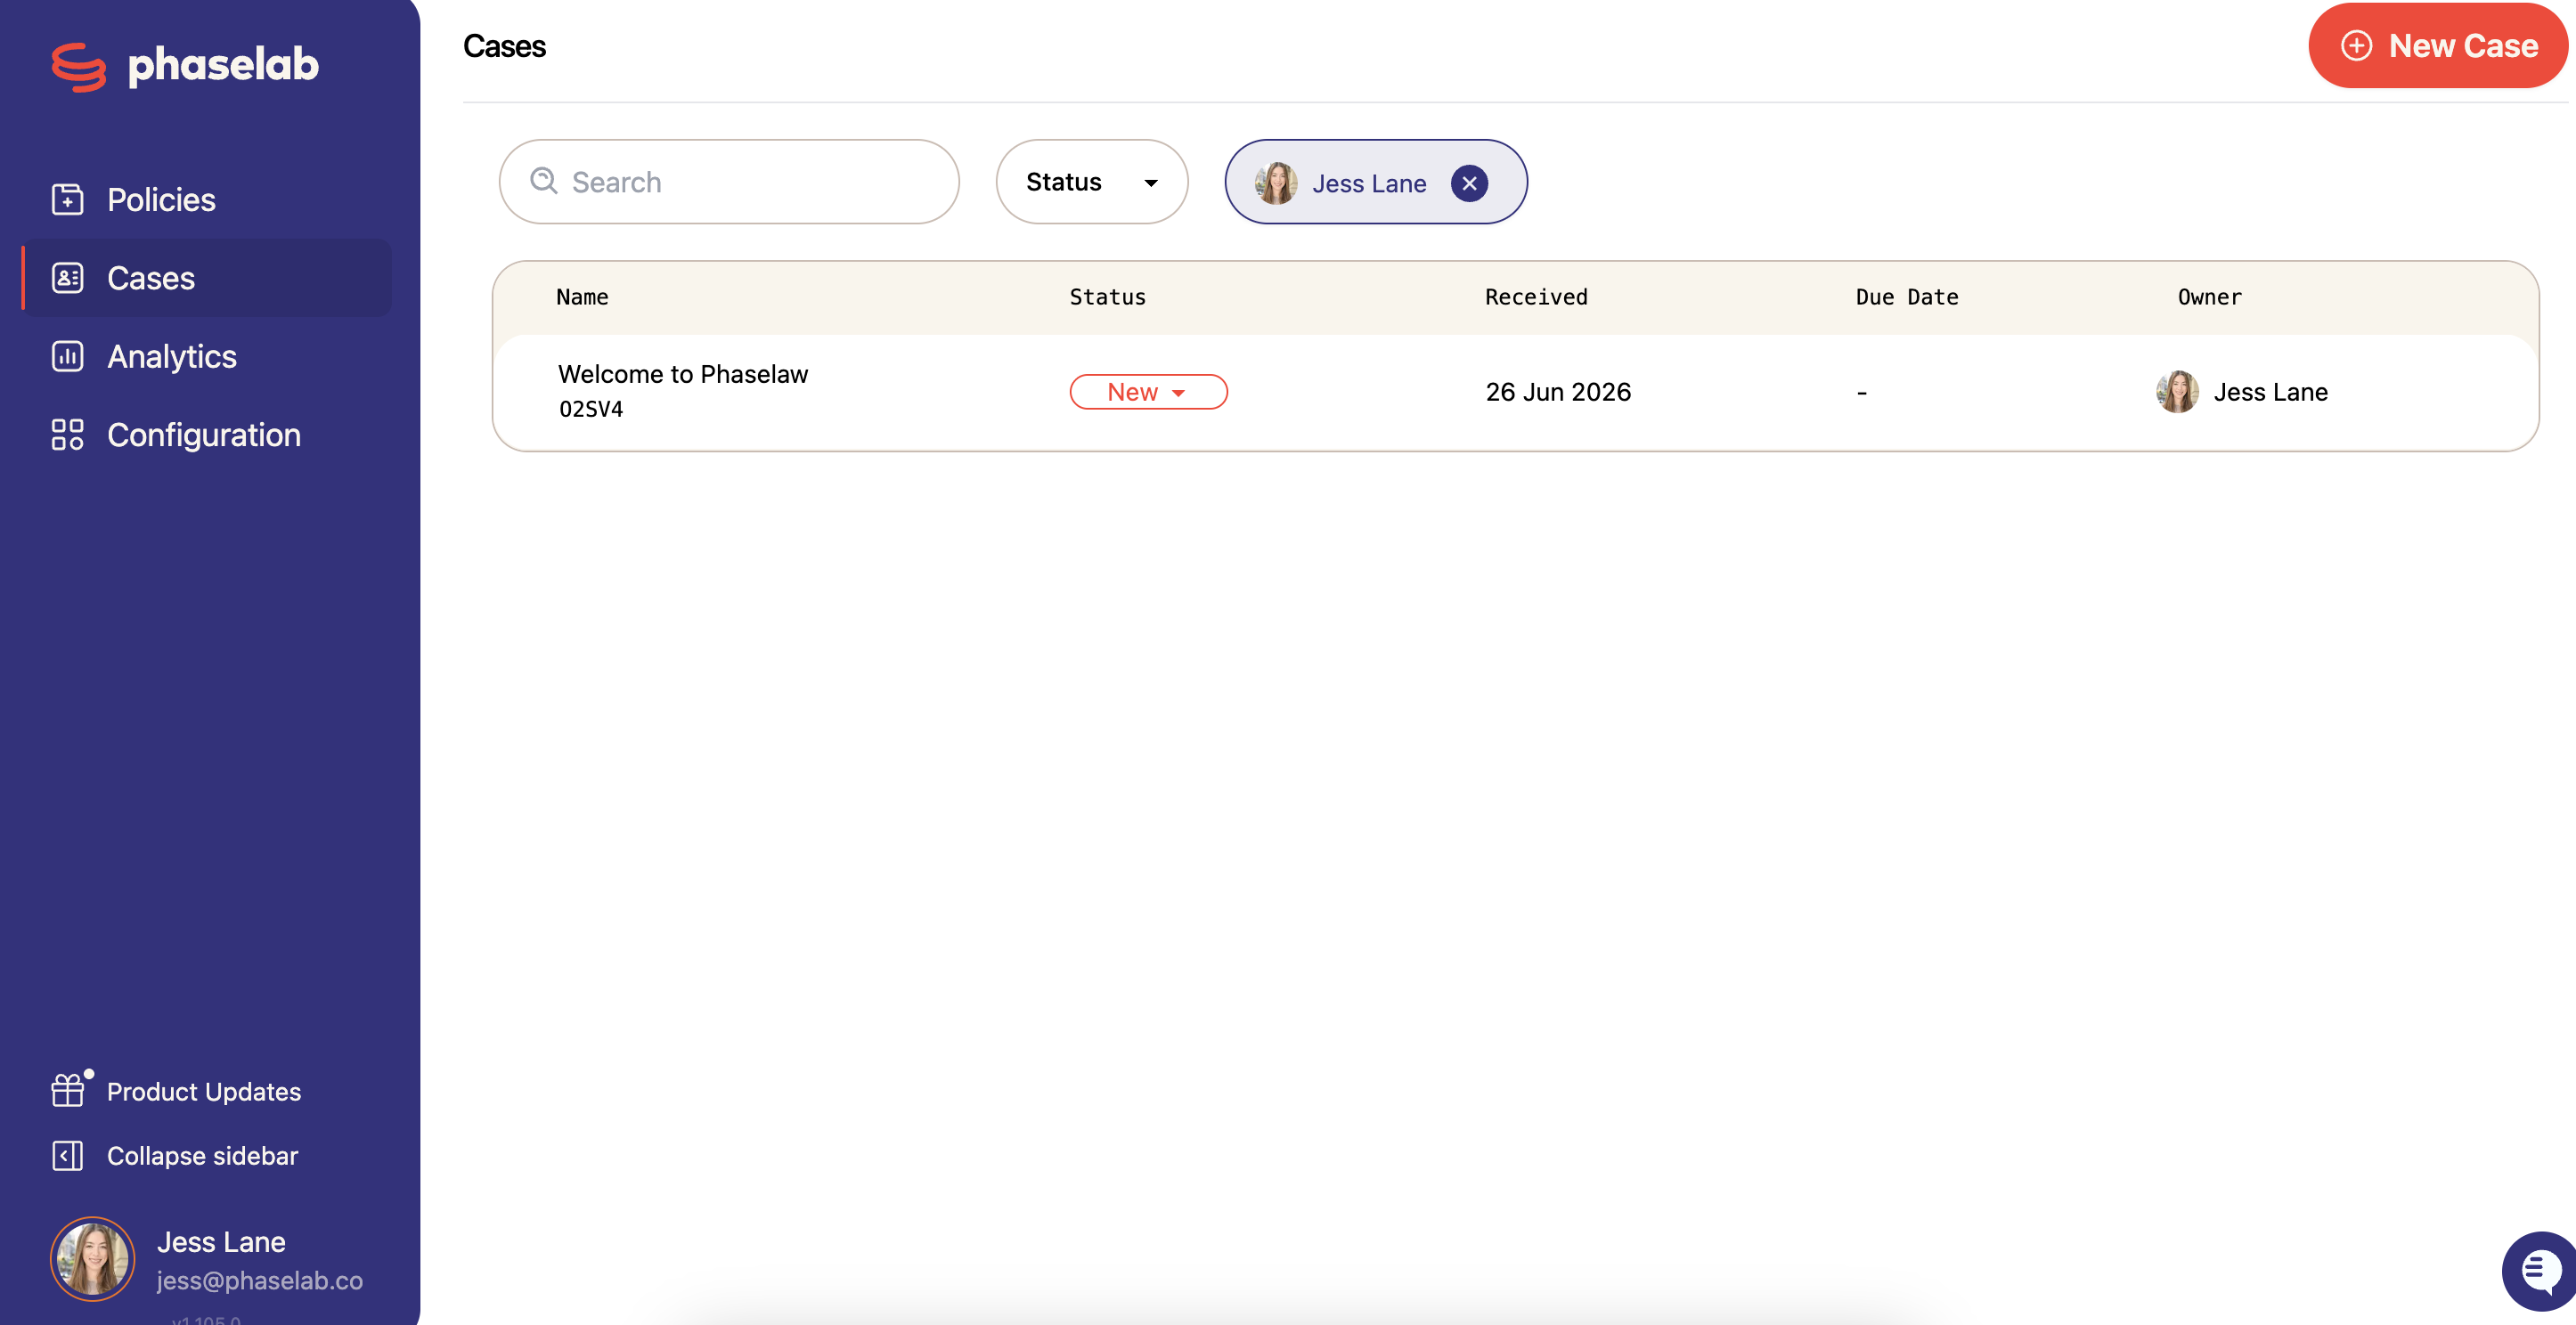
Each case in the list shows you:
The case name and unique case ID
Your unique case ID can be shared with the Phaselaw support team if you ever need help with a specific case- it helps us locate it quickly.
Its current status (e.g. New, Verification, Document Search, Document Review, Final Approval, and Closed)
The date the request was received/created
The due date for the disclosure
The owner - the team member responsible for the case
You can filter the list by Status or by a specific team member using the filters at the top, and search for a case by name using the search bar.
To create a new case, click the red + New Case button in the top right corner.
If you're working across multiple cases, the Cases screen is where you'll switch between them. Everything in Phaselaw is contained within a case, so you'll always start here.
The Case View
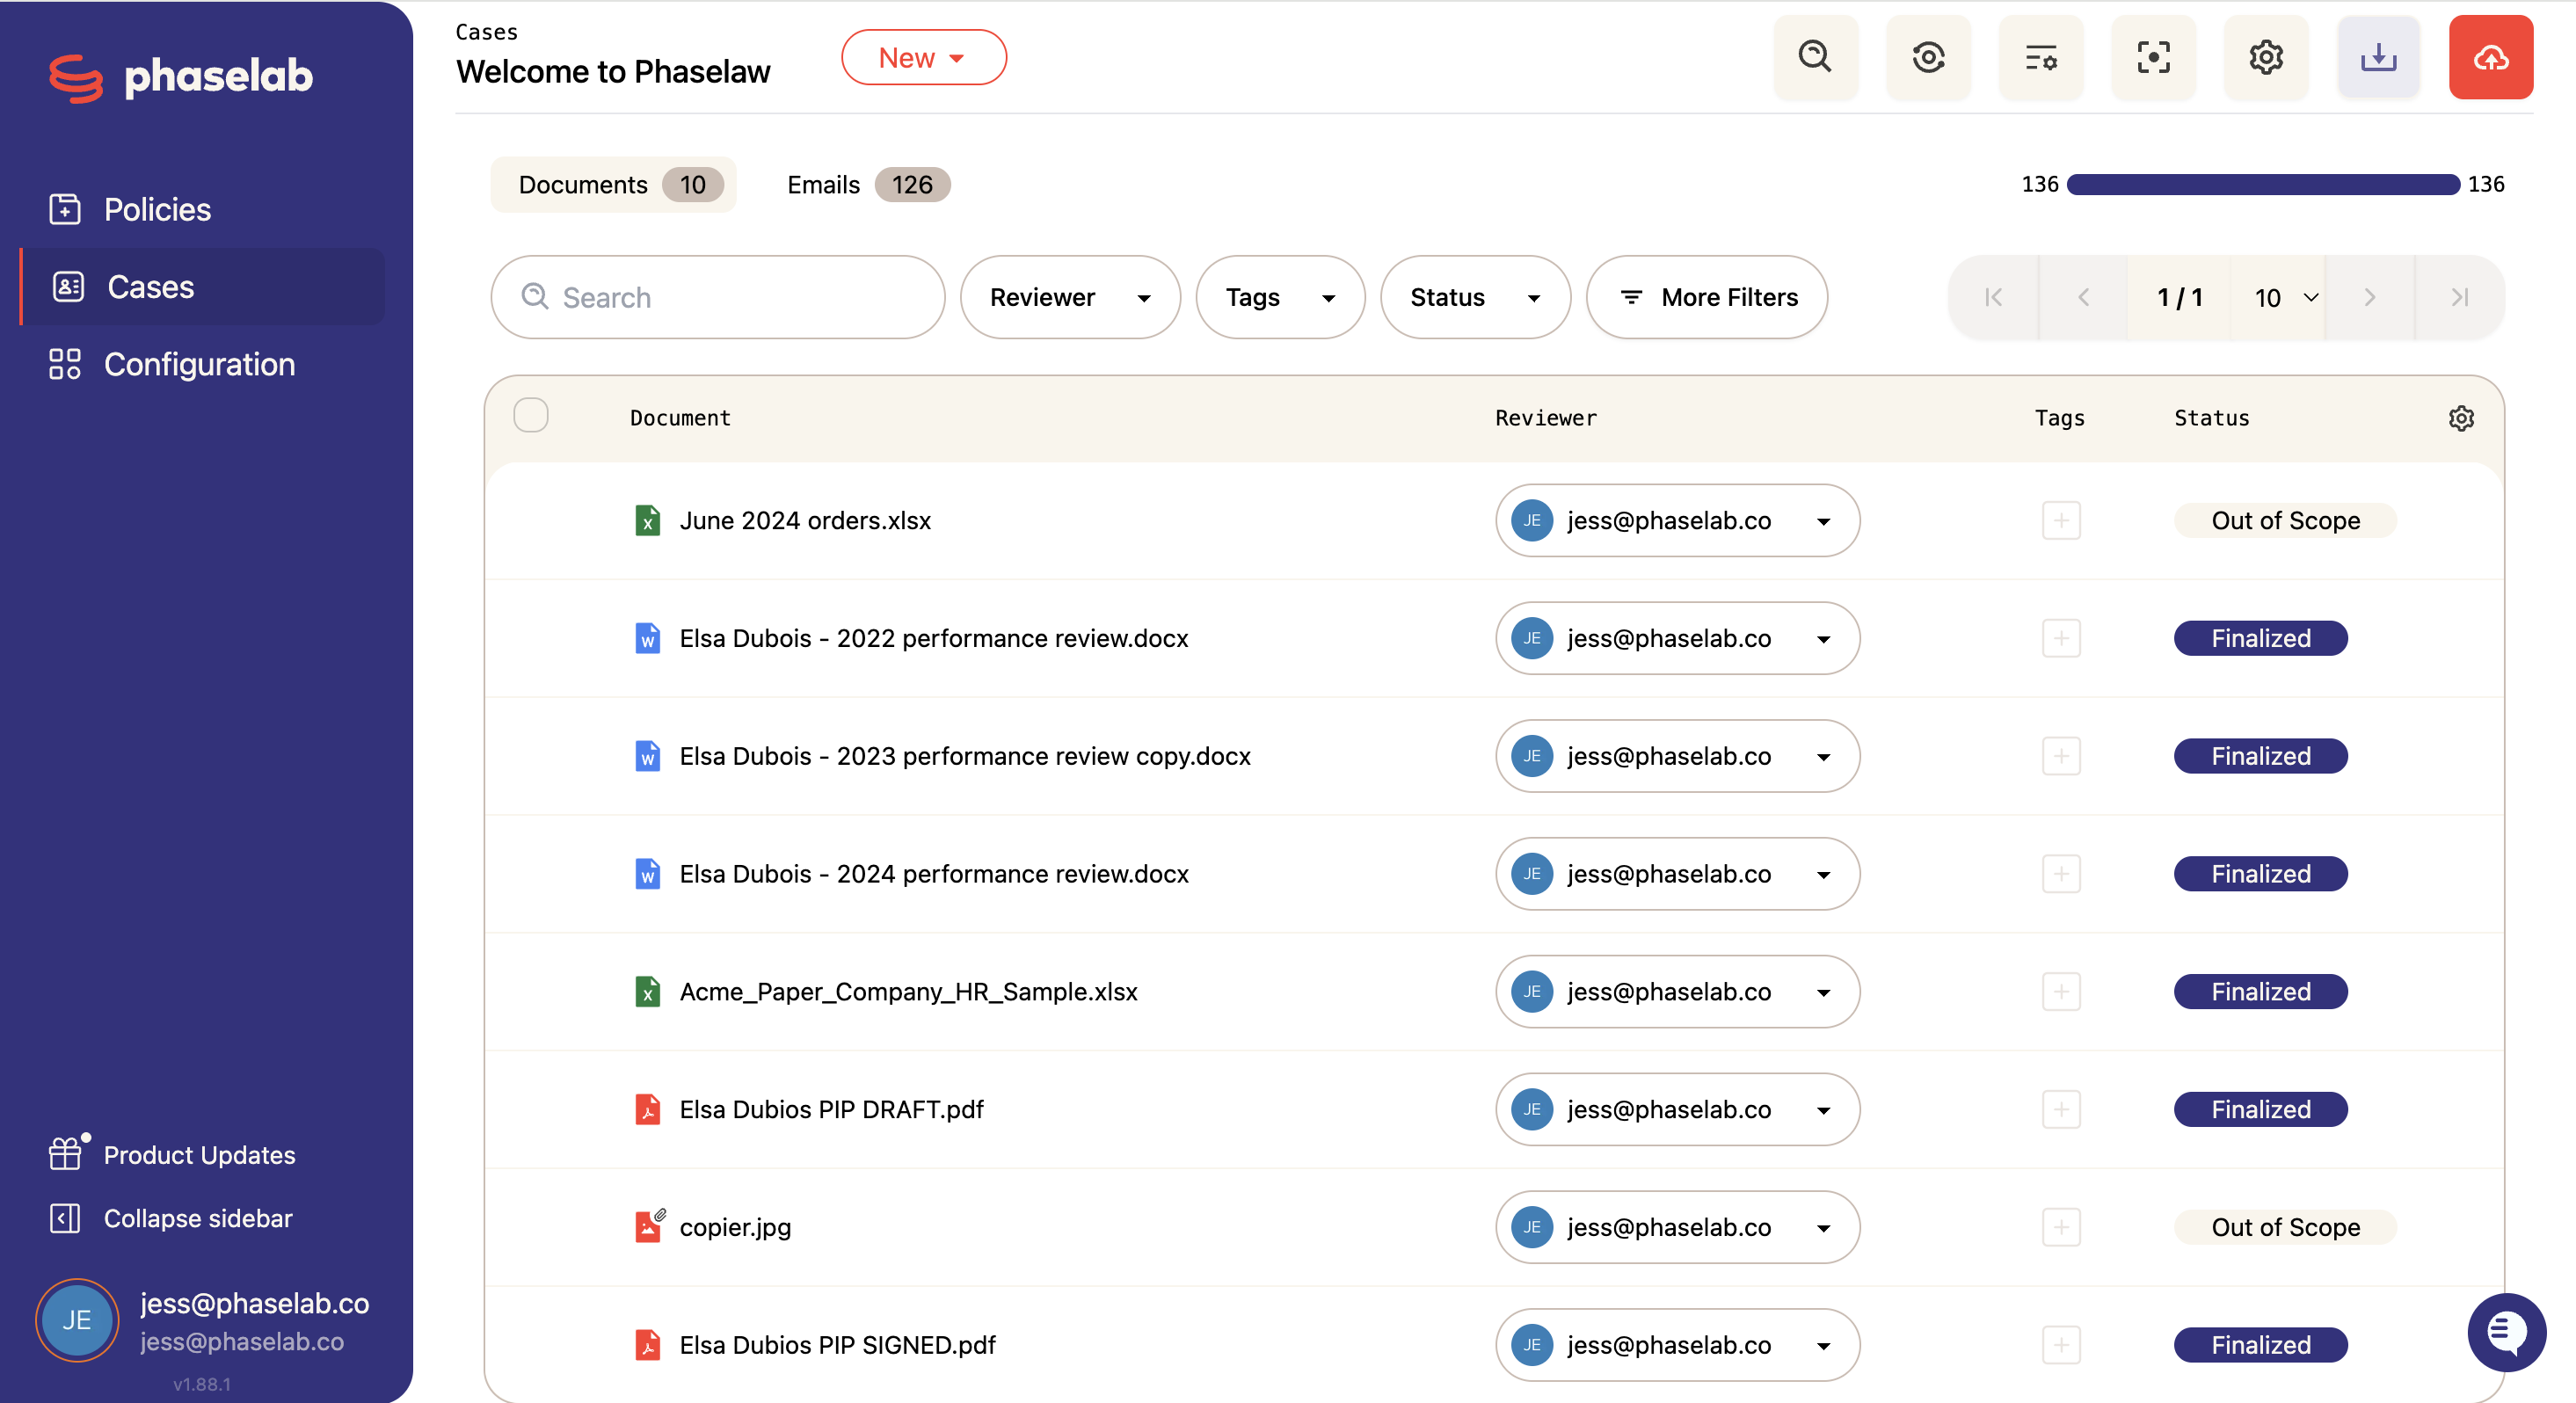
Clicking into a case takes you to the Case View - the main workspace where all of your review and redaction work happens. It's made up of several distinct areas, each covered below.
The Navigation Sidebar
On the left-hand side of the screen, you'll find the navigation sidebar. This is how you move between the main areas of Phaselaw:
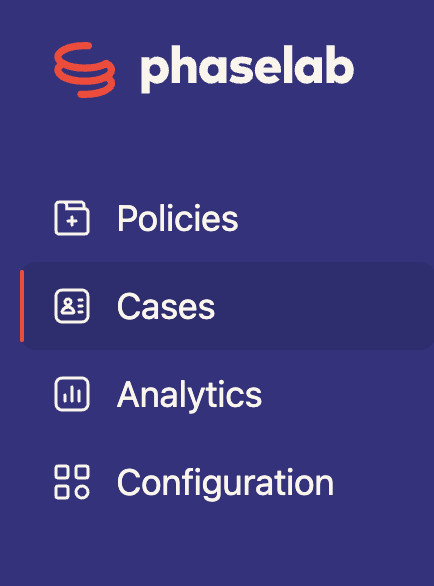
What you see in the sidebar depends on your role:
Admins see the full sidebar:
Policies- where you configure the laws and regulations governing the redactions in your cases (for example, UK GDPR)
Analytics- usage analytics, including storage and file breakdowns by month and by case.
Cases- your list of all active and past cases
Configuration- account-level settings and configuration options
Members see:
Policies & Cases
and Restricted users see only:
Cases- specific cases that have been assigned to them
At the bottom of the sidebar, all users will find:
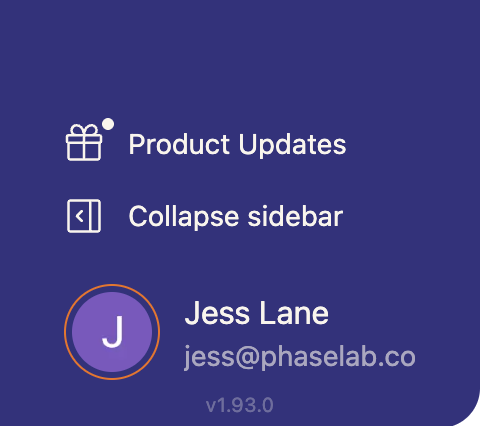
Product Updates- release notes and new feature announcements
Collapse sidebar- hide the sidebar to give yourself more screen space
Your account details - shows your name and email address. Click it to access:
Display- toggle between light and dark mode
Experiments- opt in to beta features that are not yet fully rolled out
Support- get in touch with the Phaselaw team
Sign Out
The Document List
The central panel of the case view is the Document List- a full inventory of every file uploaded to the case.
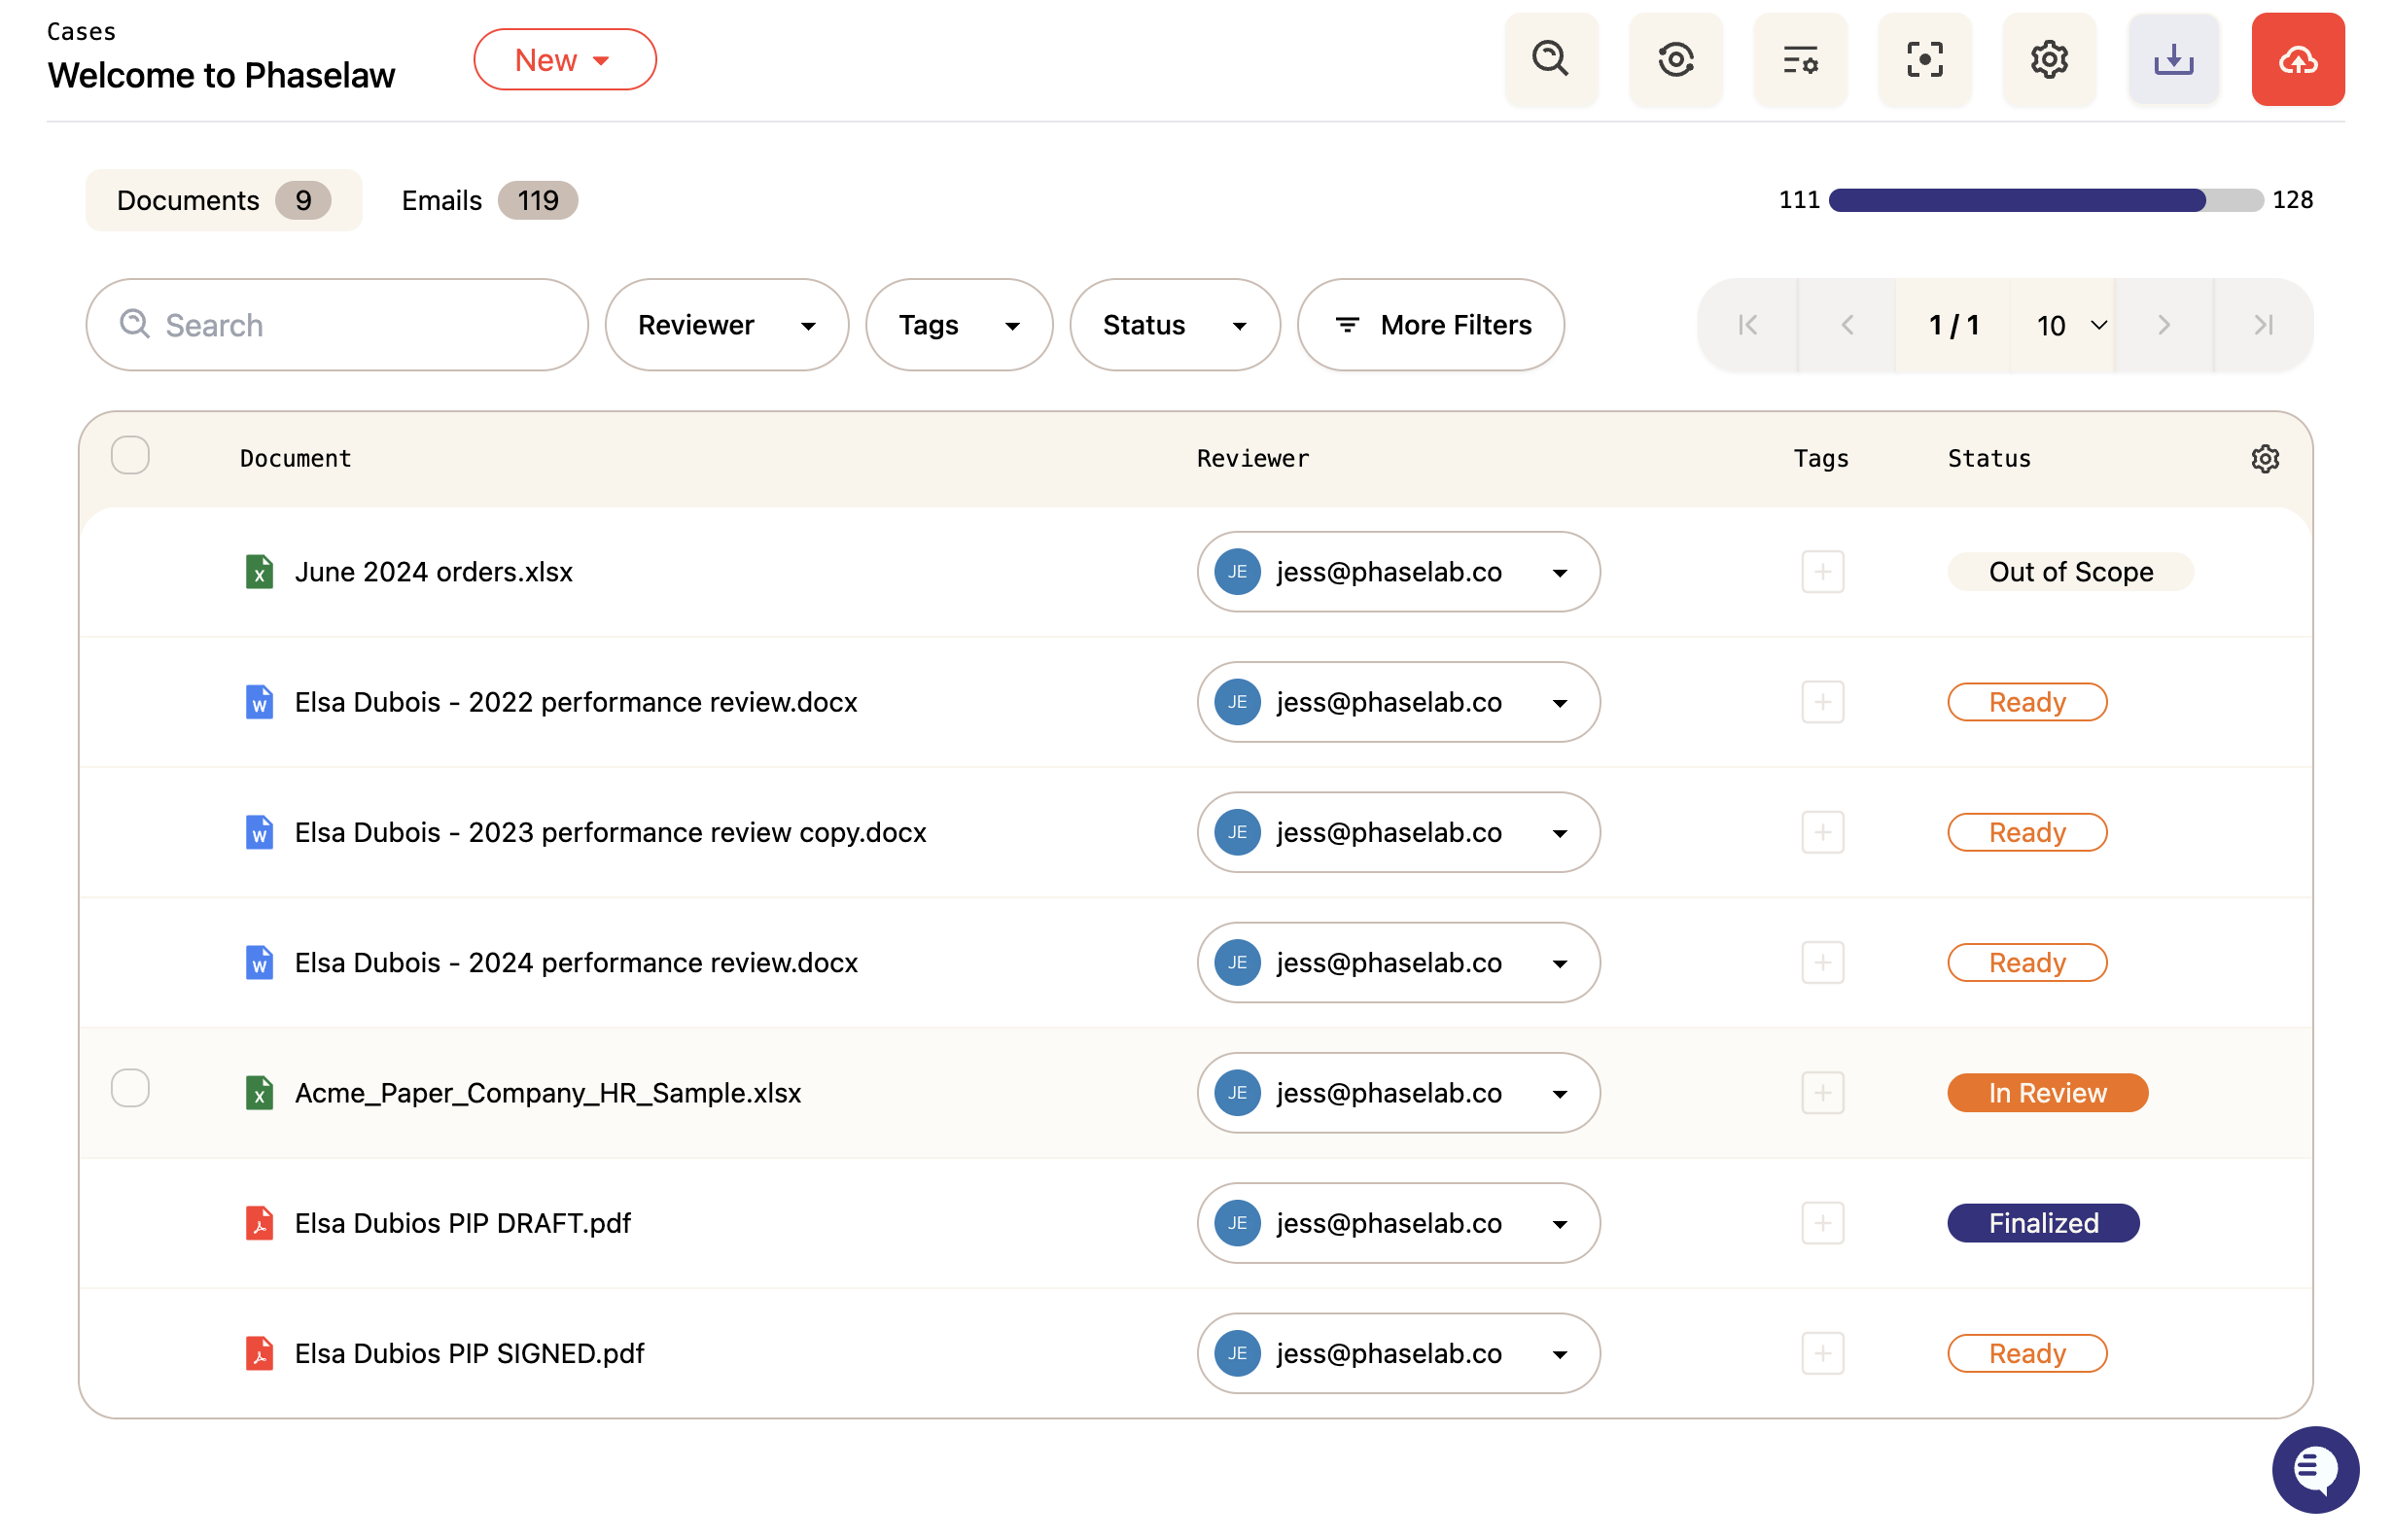
Documents and emails are split into two separate tabs- Documents and Emails. This is because they have different metadata: emails have fields like sender, subject line, and date sent that documents don't have, so each tab is tailored to show the most relevant information for that file type.
For each file you can see information such as:
The file name and type
The reviewer assigned to the document
Any tags that have been applied
Its current status (e.g. Ready, In Progress, Finalised, Out of Scope)
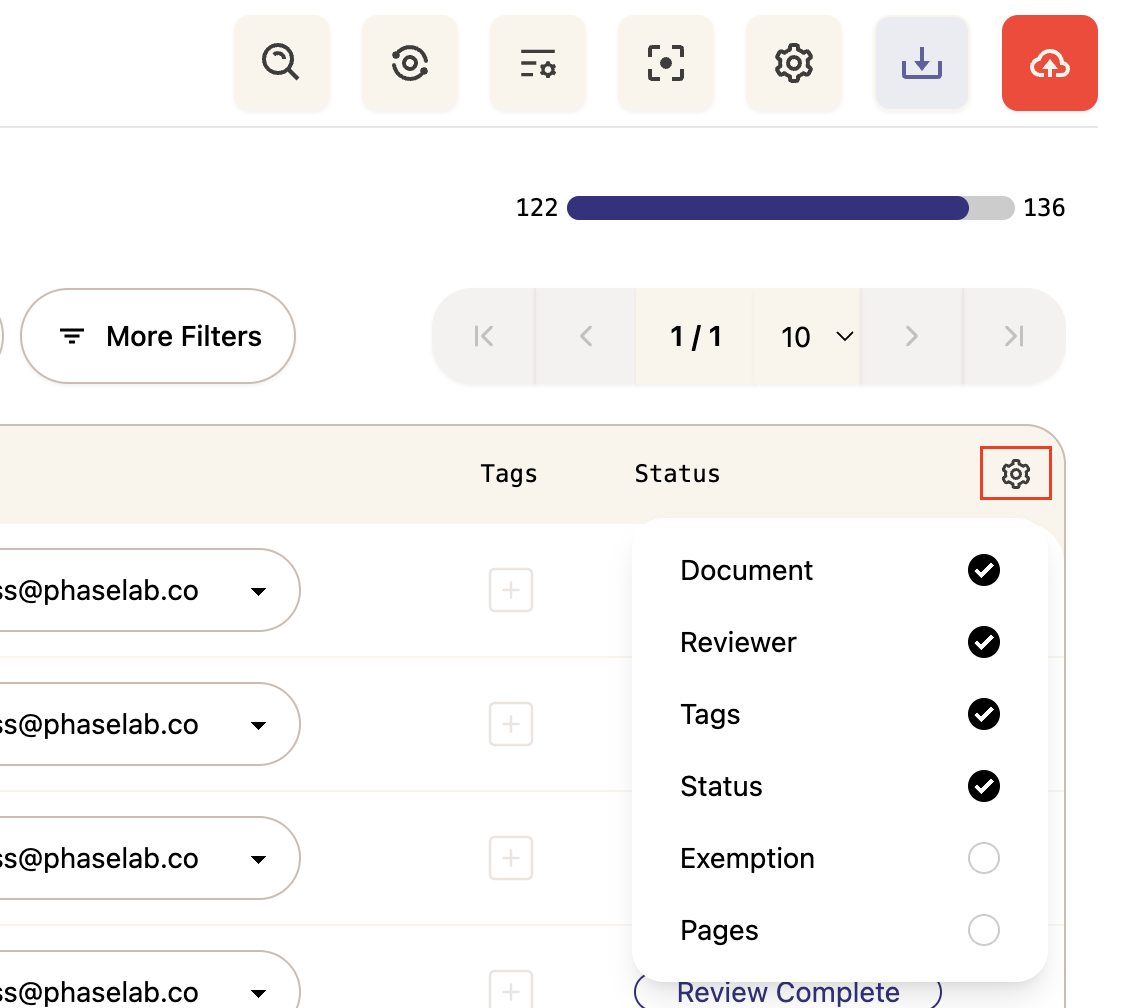
The columns you see in each tab are customisable- click the cogwheel icon in the top right of the table header to choose which fields are displayed. The available columns differ between the Documents and Emails tabs.
You can filter and sort this list to focus on specific subsets of documents — for example, showing only files that are still in a "Ready" state, or only files with a specific tag.
The Document Viewer
Clicking on any file opens it in the Document Viewer — the main redaction interface.
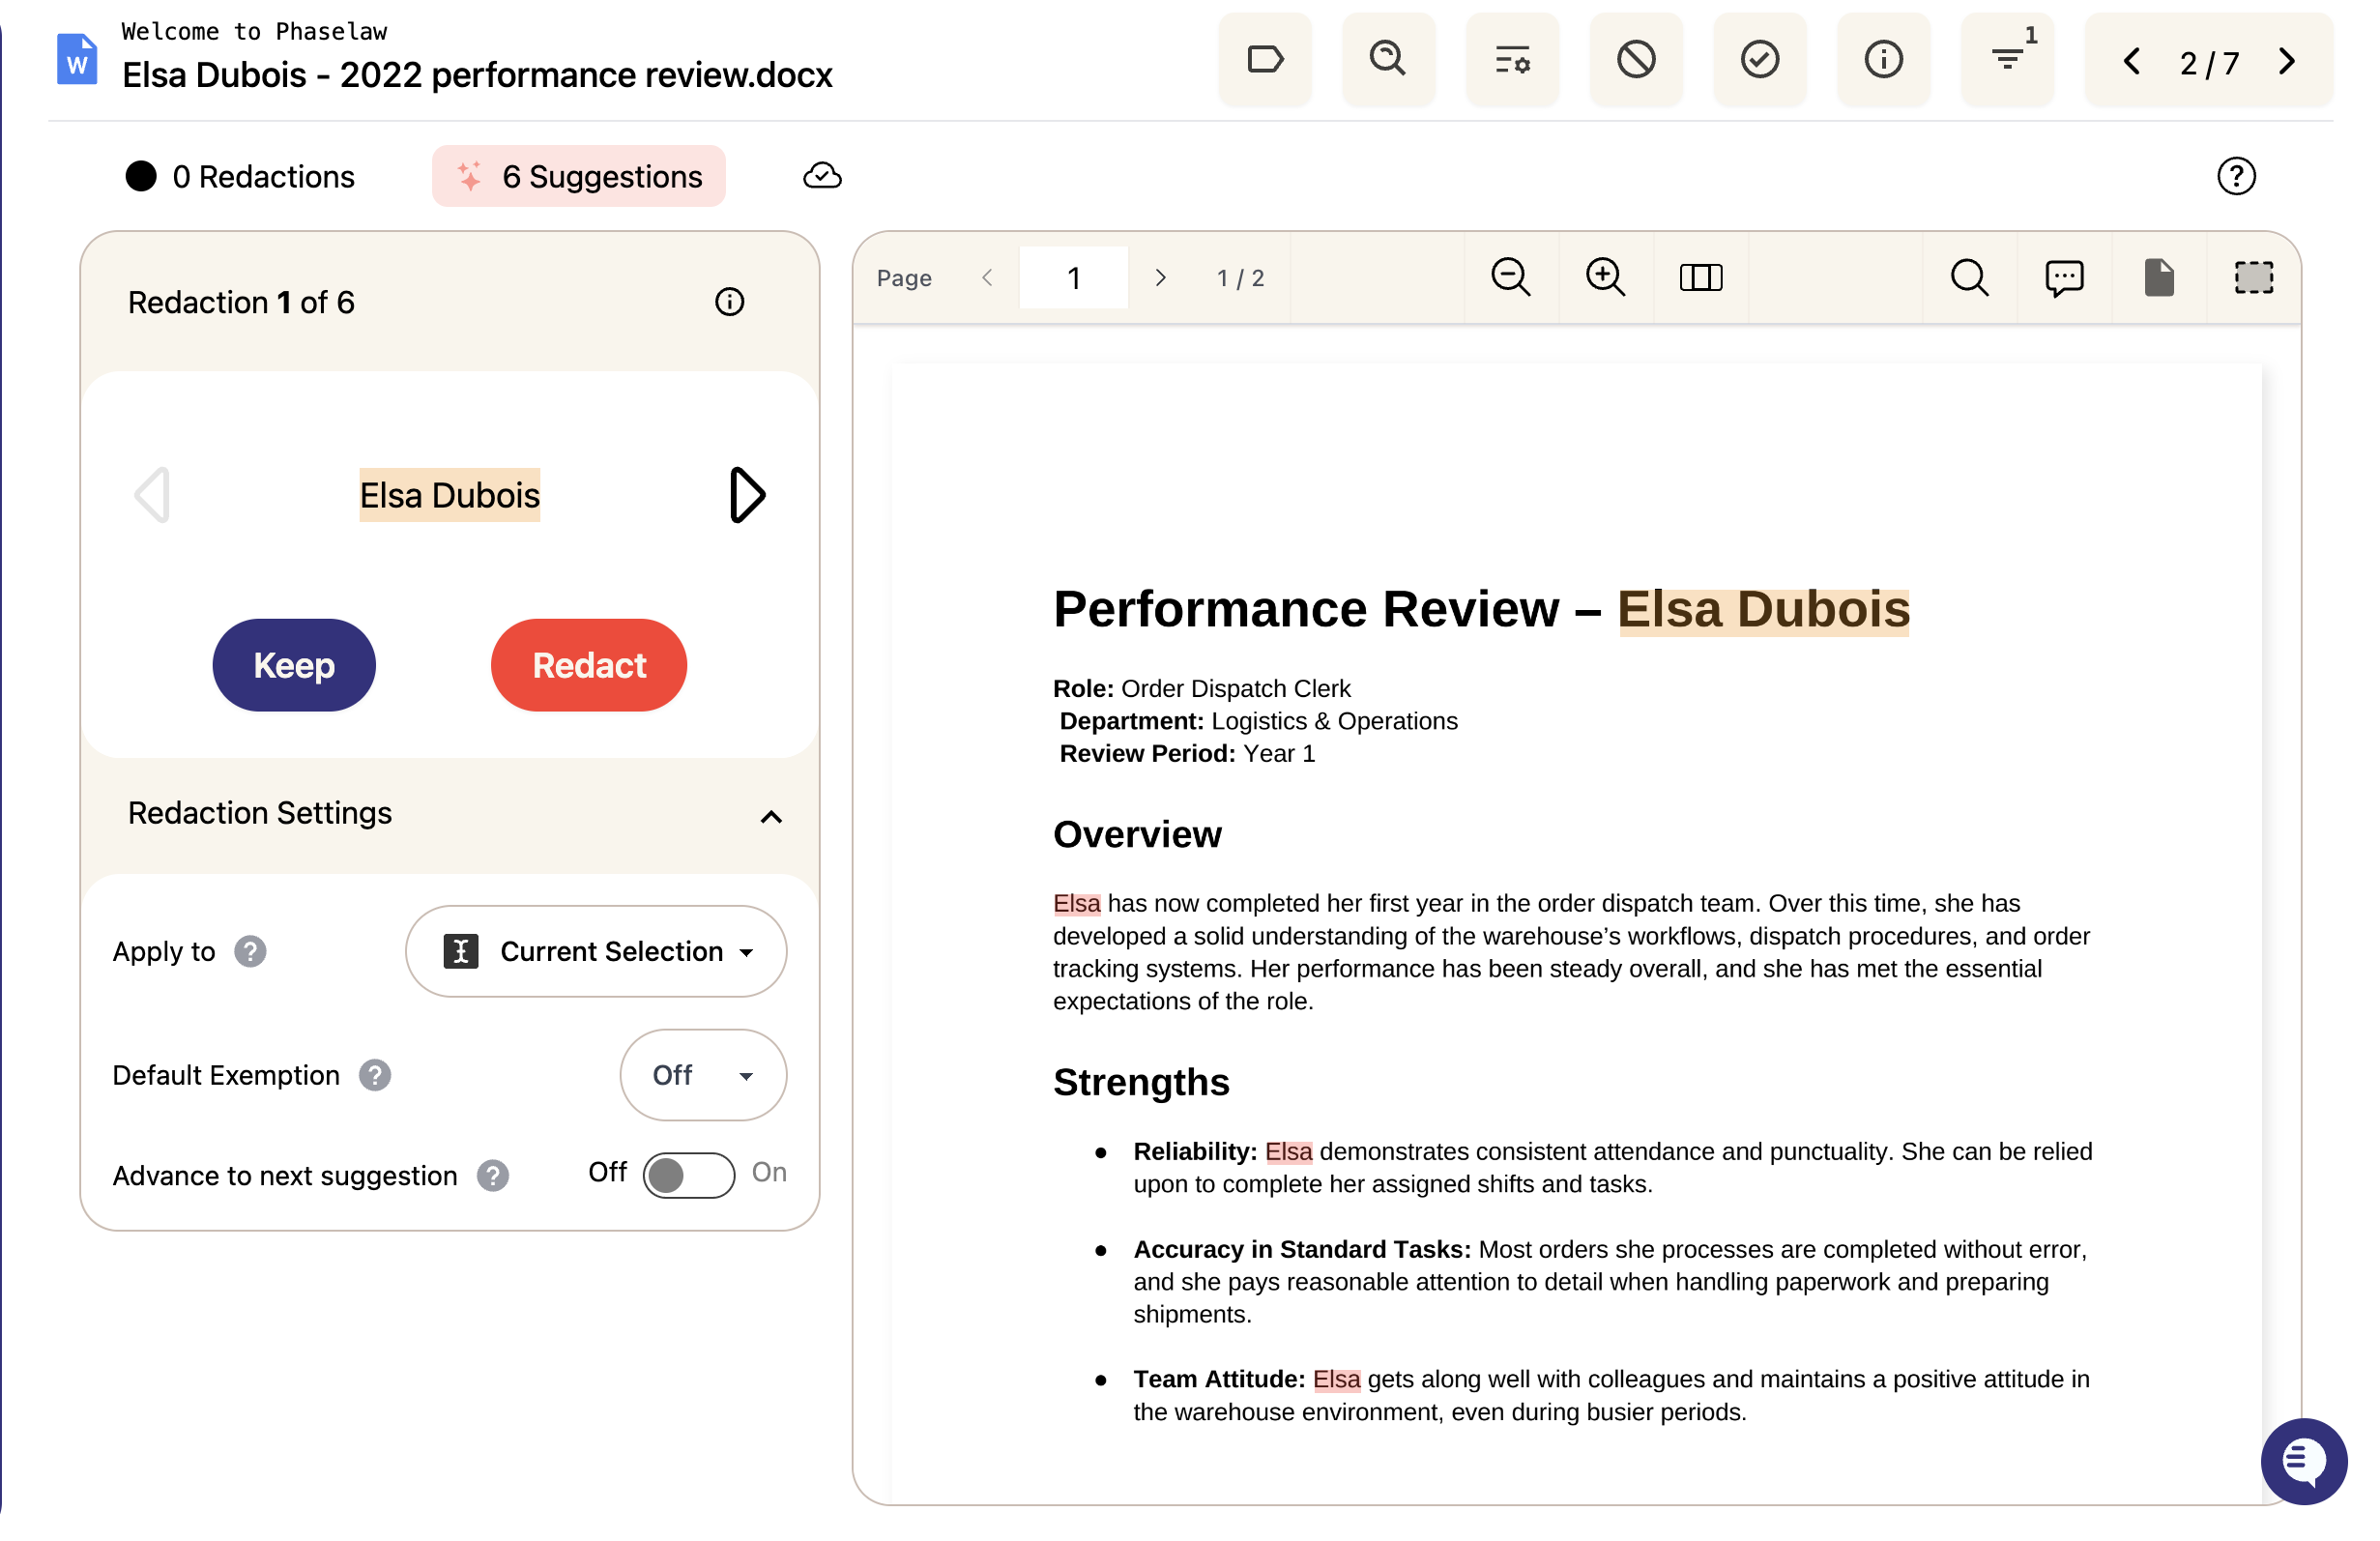
The viewer is split into two main areas:
On the left — the Sidebar Panel. Here you can:
View and work through suggested redactions one by one, accepting or dismissing each with a single click
Access Redaction Settings, where you can:
Choose how widely to apply a redaction — to the current selection, the whole document, or the entire case
Set a default exemption that will be automatically applied to all new redactions
Toggle Advance to next suggestion — when on, automatically skips over text that has already been redacted or kept, keeping you moving through the document efficiently
Review all redactions applied to the document
Set the scope of the document
On the right — the document itself, with suggested terms highlighted and a toolbar across the top for navigating pages, zooming, searching, and adding comments
At the top of the screen you can see a running count of Redactions applied and Suggestions remaining, so you always know where you are in the review.
What's next?
Now that you know your way around, you're ready to get started:
Ready to create your first case? → How to Create a New Case
Want to understand key terms first? → Key Terms: How Phaselaw Uses Them