How to Create a New Case
Last updated: August 17, 2026
In this article: How to set up a new case in Phaselaw, ready for documents to be uploaded.
Cases can be created by Admins and Members. If you don't have the option to create a case, check with your administrator that you have the correct role assigned.
Step 1: Sign in to your Phaselaw account
→ Need help logging in? How to Log In (Including SSO)
Step 2: Navigate to Cases
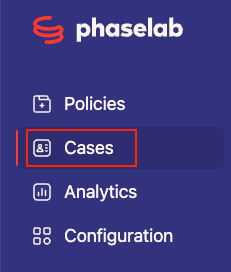
From the left navigation sidebar, click Cases. This will take you to your cases list.
Step 3: Select "New Case"
Click the red + New Case button in the top right corner of the Cases screen.

Step 4: Enter a case name
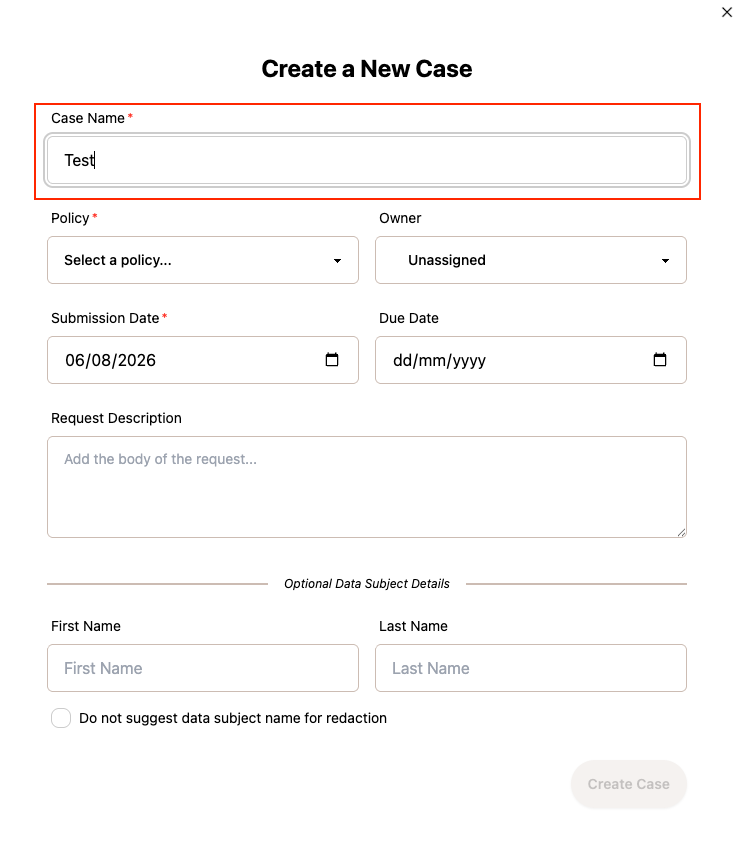
In the Case Name field, enter a name for the case. This is usually the name of the request or the data subject — whatever makes it easy for your team to identify at a glance.
Step 5: Fill in the case details
Complete the following fields:
Policy — Use the Policy dropdown to select the policy that applies to this case- for example, your UK GDPR policy. Your policy defines the exemption rules and deadlines that will govern the case.
Don't have a policy set up yet? Under the Policy dropdown, you can scroll to the bottom and select +Create New Policy to be taken to the Create New Policy Page. See how to create your first policy here→ Creating Your First Policy
Owner (optional)— assign the case to a team member. If you're managing the case yourself, select your own name. You can leave it as Unassigned and update it later
Submission Date — the date the request was received (defaults to today's date)
Due Date (optional) — the deadline for responding to the request. You can update this at any point.
Request Description (optional) — add the body of the request here for reference. It appears at the top of the Notes panel, where your team can refer to it and add their own notes as the case progresses. → Using Case Notes
Step 6: Add data subject details (optional)
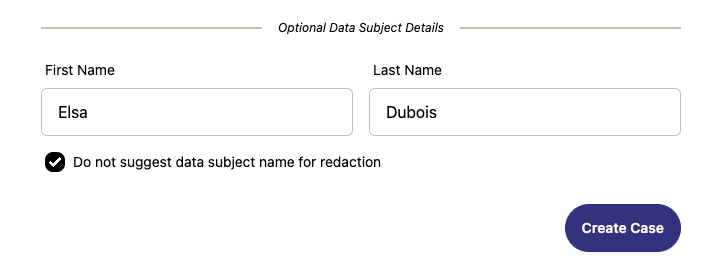
The Optional Data Subject Details section lets you record information about the data subject:
First Name and Last Name — the data subject's name
Do not suggest data subject name for redaction — tick this box to automatically add the data subject's name to the Do Not Suggest list, so it won't be flagged as a redaction suggestion across the case → How to Use the Do Not Suggest List
Step 6: Create the case
Once you're happy with the details, click Create Case. You'll be taken straight into your new case, ready to start uploading documents.