How to Set Up and Manage Workspaces
Last updated: November 11, 2026
In this article: What workspaces are, how to create and switch between them, and how roles and shared policies work across them.
Workspaces let you split your account into separate areas, each with its own cases, members, and settings. They’re useful for organisations with multiple teams or subsidiaries, and for consultancies that want to keep each client’s cases separate.
Workspaces are an Enterprise feature and are enabled per account. If you’d like to use more than one workspace, get in touch with our Support Team using our in-app chat or by emailing support@phase.law.
What changes when you use workspaces?
Every account has a default workspace called General. If you only have one workspace, everything works exactly as it did before, apart from one change: the Admin role is now called Organization Admin.
Once you have more than one workspace enabled, a workspace picker replaces the Phaselaw logo at the top of the sidebar, so you always know which workspace you’re working in.
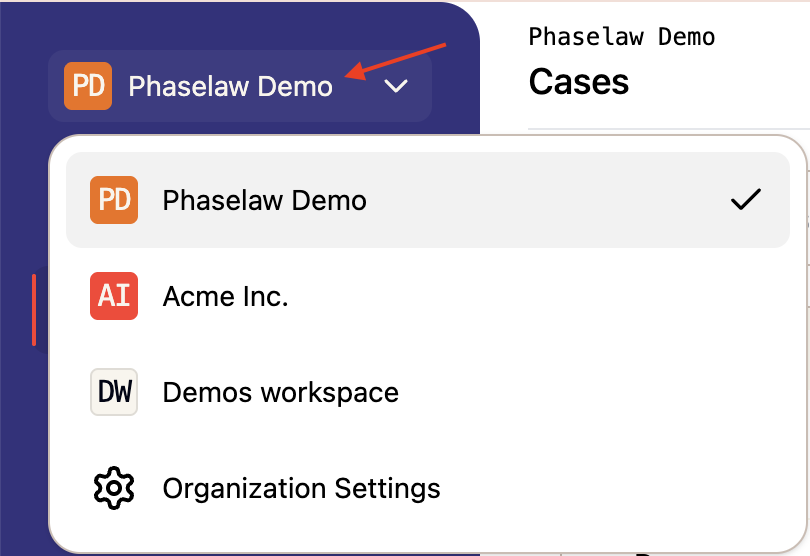
Understanding roles
Roles work at two levels:
Organization Admin — has access to every workspace and can manage organisation settings, workspaces, and members across all of them
Workspace roles — set separately for each workspace:
Admin — full access to all cases in the workspace, plus the ability to manage users and configuration
Member — can view and manage all cases in the workspace, but cannot access configuration or manage users
Restricted — can only access cases they’ve been explicitly granted access to. Useful for external stakeholders
Review your admins when workspaces are enabled. Anyone who was an Admin before enabling Workspaces becomes an Organization Admin, with access to all workspaces. These users appear in every workspace’s member list as inherited roles. If some of your admins should only access certain workspaces, change them from Organization Admin to a workspace-level role.
View your workspaces
Organization Admins can see all workspaces in one place:
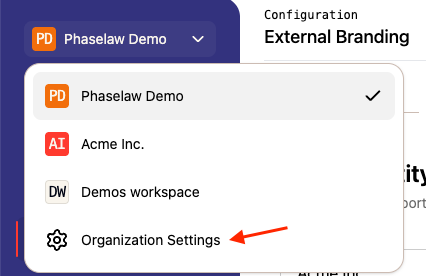
Click Organization Settings at the top of the sidebar
You’ll see a list of every workspace, along with its members and number of cases
From here you can rename a workspace or open its settings.

Create a new workspace
Navigate to Organization Settings
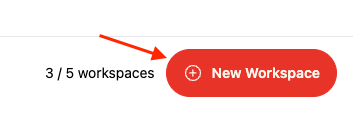
Select New Workspace
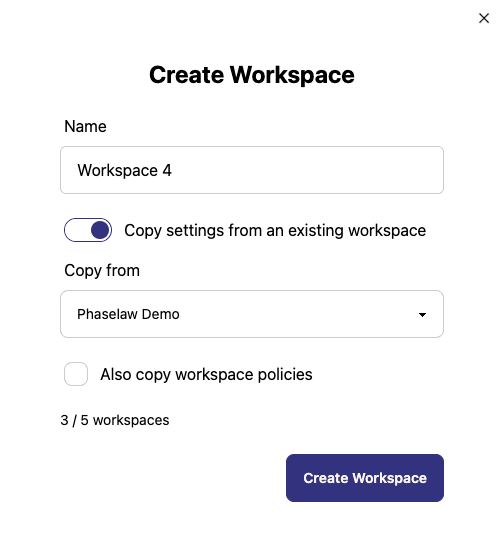
Choose how to set it up:
Add your Workspace name
Create it with default settings — a fresh workspace with Phaselaw’s standard settings
Copy settings from an existing workspace — select the workspace to copy from. You can also choose to copy its policies
Click Create Workspace
If you want the same policy in every workspace, use a shared policy instead of copying it into each one. This means you only have one version to maintain. See Shared policies below.
Switch between workspaces
Use the workspace picker at the top of the sidebar to move between workspaces. Everything you see — cases, members, tags, and settings — belongs to the workspace you’ve selected.
Manage members across workspaces
You can manage who has access to which workspace in two places:
Organization Settings — see a full list of Workspaces, an overview of how many members/admins there are in each. Click on Go to workspace settings for the relevant workspace. Next, navigate to Manage Members to see every member of the workspace and their role. You can edit roles here, including adding someone to a workspace and choosing their role in it
Configuration → Manage Members inside a workspace — manage members for that workspace only
Inviting new users: When you invite someone who isn’t an Organization Admin, you can only add them to one workspace to start with. Once they’ve accepted the invitation and logged in, you can add them to additional workspaces.
→ Learn more: How to Invite Team Members to Your Account
Workspace-specific settings
Each workspace has its own settings. When you open Configuration inside a workspace, the settings and members you see apply to that workspace only. This means you can, for example, have different tags and redaction styles for each client or team.
Shared policies
By default, a policy belongs to the workspace it was created in. If you want to use the same policy across all of your workspaces, you can make it a shared policy:
Open the policy you want to share
Turn on the option to make it available to all workspaces
The policy will now appear under Shared Policies and can be selected in any workspace
